Tutorial (Continued)
6. Ontofox hands on demo:
Step1: Specify a source ontology from which ontology terms will be retrieved and used for importing into a new target ontology. You can select an ontolgy from the dropdown list (Fig 1.1) or enter the URL and the SPARQL endpoint in the textarea (Fig 1.2)
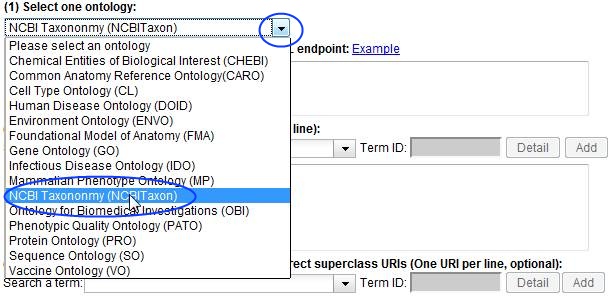
Fig 1.1
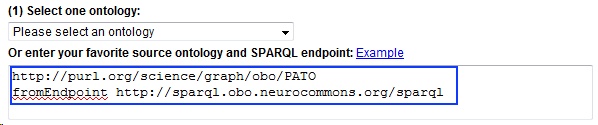
Fig 1.2
Step 2: Enter the URI of the low level source term you wish to import. Alternatively, you can search a term by entering keywords related to the term (term label or synonyms, partial words supported) in the input box. After you type three or more characters in the searching box, a list of terms which match your input will be dynamically added to the dropdown list below the input box (Fig 2.1). Aftern a term is selected or fully typed, the ontology ID for this term will be shown in grey color. If the "Detail" button is clicked, the detailed information about the term will be shown in a seperate page (Fig 2.2). For some of the ontologies, the detail pages are links to the individual ontolog browsers provided by their corresponding developers. Others are linked to our OntoBee ontology browser (http://ontobee.hegroup.org/). Multiple terms can be added one by one.
Once you find a term you want, click "Add" button, the term URI and its label will be added to the textarea (Fig 2.3).
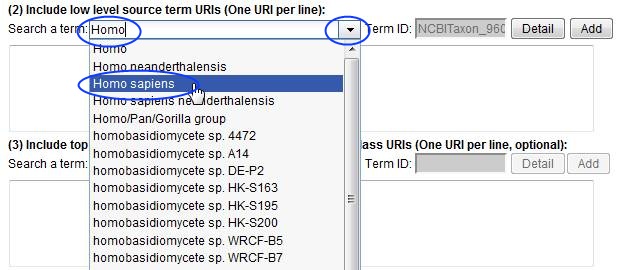
Fig 2.1
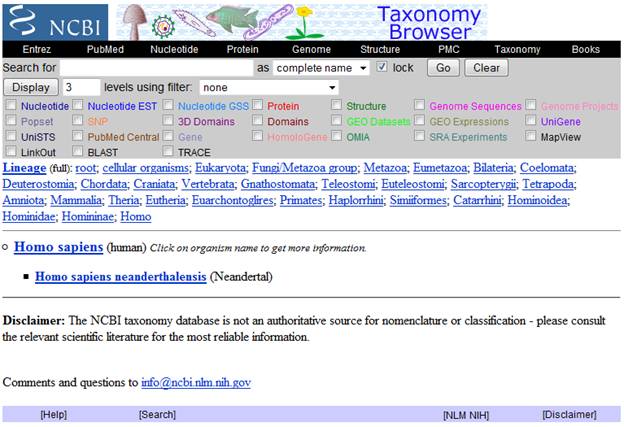
Fig 2.2
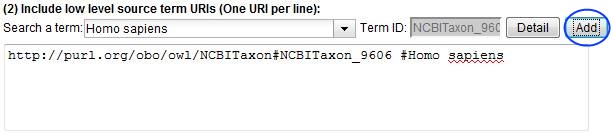
Fig 2.3
Step 3: Enter the URI of the top level source term that you wish to import. You can use the same technique to search the terms as shown in step 2 (Fig 3.1).
Once you find an ontology term, click "Add" button. The term URI and its label will then be added automatically to the textarea (Fig 3.2). You can enter the target direct superclass URI for the term (Fig 3.3) or remove the text "subClassOf" if don't want to specify the target direct superclass for the term.
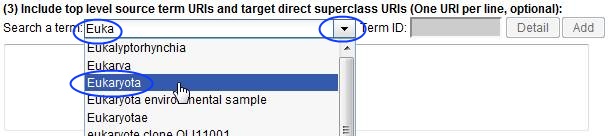
Fig 3.1
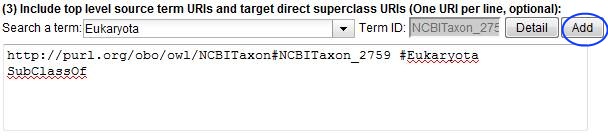
Fig 3.2
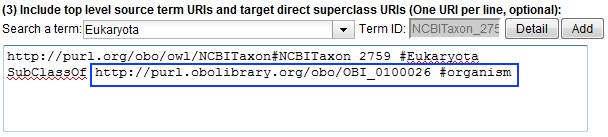
Fig 3.3
Step 4: Sepcify setting for retrieving intermediate source terms. Select one of the options listed in the dropdown list (Fig 4.1).

Fig 4.1
Step 5: Specify annotation(s) to be included for the source terms. We have provided some commonly used annoations for you to choose. Click "rdfs:label", the URI for annotation rdfs:label will be added to the textarea (Fig 5.1). If you wish to include "iao:preferredTerm", click the link, the corresponding URI will be added to the textarea (Fig 5.2).
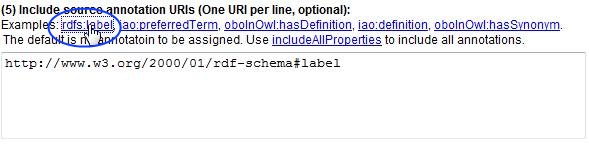
Fig 5.1
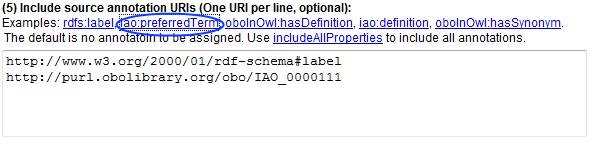
Fig 5.2
Final Step: After filling ou the form, click "Generate Ontofox Input File" (Fig 6.1). A text file, i.e., an Ontofox input file, will be generated (Fig. 6.2). This Ontofox input file can be saved for later use. Click "Generate OWL (RDF/XML) File" (Fig 6.3), a page with the link to the OWL output file will be displayed (Fig 6.4). You can save the OWL output file by right click the link and select the menu item "Save Link As"(Fig 6.4). Our server will store the input and output files for around 24 hours and the locations of these files are also shown in the result page.You can destory these files if you don't like them to be temporarily stored on our server (Fig 6.5).
![]()
Fig 6.1
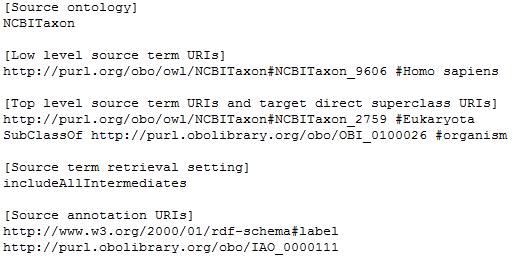
Fig 6.2
![]()
Fig 6.3
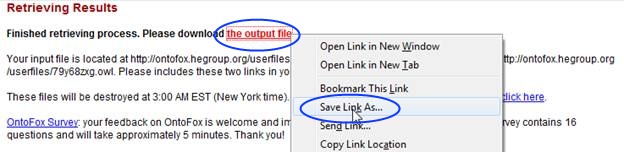
Fig 6.4
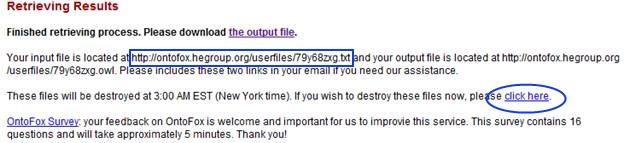
Fig 6.5